Preparing Chicken
Episode 7 | 24m 59sVideo has Closed Captions
Preparing chicken for the grill; boning and stuffing chicken; trussing chicken.
Preparing chicken for the grill, sauteing and roasting; boning and stuffing chicken; trussing chicken.
Problems playing video? | Closed Captioning Feedback
Problems playing video? | Closed Captioning Feedback
Preparing Chicken
Episode 7 | 24m 59sVideo has Closed Captions
Preparing chicken for the grill, sauteing and roasting; boning and stuffing chicken; trussing chicken.
Problems playing video? | Closed Captioning Feedback
How to Watch The Complete Pépin
The Complete Pépin is available to stream on pbs.org and the free PBS App, available on iPhone, Apple TV, Android TV, Android smartphones, Amazon Fire TV, Amazon Fire Tablet, Roku, Samsung Smart TV, and Vizio.
Providing Support for PBS.org
Learn Moreabout PBS online sponsorship- Hi, I'm Jack Pepin, and all of the thousands of recipes that I've made over the years require one common ingredient and never change, the right technique.
30 years ago, I wrote a book about cooking technique and 10 years ago, I made this TV series, and the information is just as relevant as always.
I hope you find this lesson helpful in your kitchen.
Happy cooking.
Chicken is extremely versatile, especially when you know what to do with it.
And I'm gonna show you a different way of using it.
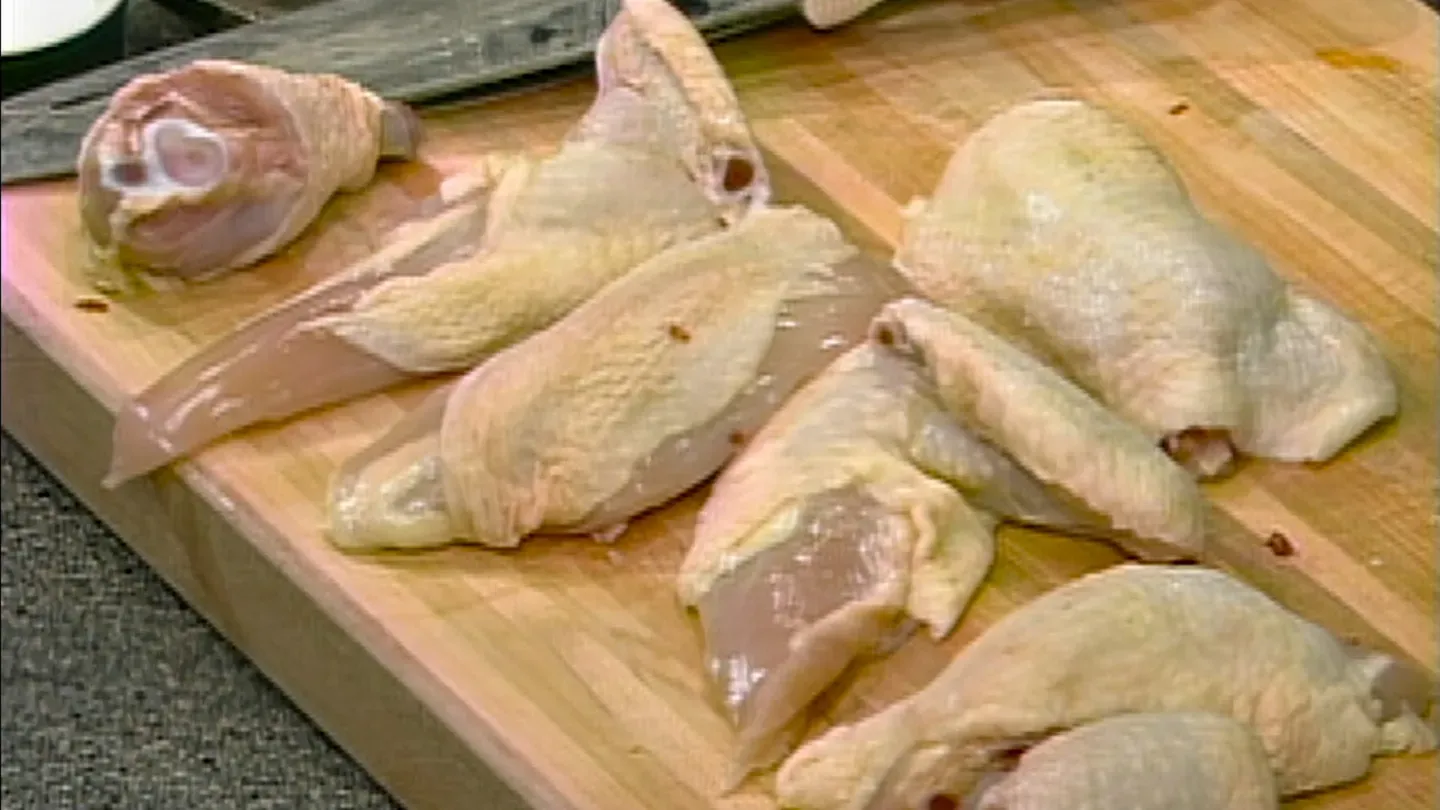
That first chicken here, which is about three pound, you know, a kind of roaster, I want to do it for grill.
And when you do it for grill, you see the back of the chicken here?
I want to take the strip of the back with a large knife like this, just go into it and cut either on each side like that, or if I open it here, I can cut it this way to remove that back, which of course I'm going to use for stock.
Right, now, usually for grill also, I will take the hand of the wing here, again, keeping that for stock.
I'll cut a little bit underneath here just because I feel that the joint takes a little longer to cook and I wanna be sure that the heat goes into it.
I will do the same thing with the leg.
Put this flat here and I leave the bone to grill it.
I leave the bone to grill it because I feel that it has a better taste and after it's been cooked, if you want, after it's been grilled, you can remove those bone, if you want.
Again, between the joint of the thigh and the drumstick, I open it a little bit, which makes it bigger.
If you want to do it bit more classy, we make a hole here to insert the end of the drumstick, this way.
And very often, in that type of thing, if you are not sure that it's totally flat, you know, you can put a piece of plastic wrap on top and with the back of a pan, you know, or something like that.
Be sure that is nice and flat and as I say, again, you can use a little skillet or something like this, which work perfectly fine for this, that basically your chicken for grilling and you wanna grill it mostly on the skin side.
Most of it is going to be cooked on the skin side.
Now I say, that's where the fat will fall out and so forth.
And at the end of it, if you want to remove the skin, it's perfectly fine too, but you don't have to.
Another way of doing the chicken is to saute, so called, that when you do a stew and so forth.
And very often now, when we do those stew, we remove the skin.
In that one, I'm not removing the skin.
So again, the end of it this way, and I wanna remove the two leg at the joint.
The mistake that people do very often is to leave the chicken this way, put it on the side, lift up the chicken, use the wing of the chicken itself because as you see, if I cut the hand of the skin here, just the skin around, it's basically all done.
So what I have to do here is to cut the little oyster there.
You see I have an oyster, and it finished there.
And again, another common mistake is that people extend the leg and try to break it up, and it doesn't work.
What you have to do is to bring that leg back so that the thighbone is perpendicular or parallel, rather, to the carcass.
Grab it at the knee and crack it open.
Then you cut through that sinew there, that large sinew here, that's it, and then pull out.
So as I said, basically you cut skin, get the oyster, break it open, crack through the sinew, and pull out.
That's it.
Now the same thing with the wing.
There is the articulation of the wing, which is right there.
You can feel it with your finger if you move the joint here.
So what you do, you cut it right there and you cut a piece, you can cut the whole wing, or only a piece of the meat here and hold it there with your knife, you pull out.
And you have that part here.
The same thing on the other side.
Cut through the sinew, a piece of the breast meat, hold it, and pull out.
What do I have left, now?
A piece of the sternum right on top, you can put that thread with a larger knife.
You cut the piece of your sternum here, which is the white meat.
I have the whole carcass here which is going to be used for stock, again.
What I have is the sternum here.
So that would be basically this way.
The two leg, the leg conventionally are separated, the drumstick and the thigh.
Cut the end of the drumstick so that when you cook, it shrink, you know, like a little ham like this.
You put this there, again, the same way here, and basically, this is your poulet poele sorte.
And now what I wanna show you, again, it's how to do a gallotine that is boning out the whole chicken to do a type of roll that we call a gallotine or a ballotine.
Usually the first thing you do too, you remove the wing like that.
And with those wing, actually we can do lollipop.
That is, you hold it this way, take a towel to hold it this, put your hand like this and you break it at the joint here, there is the joint here.
You wanna break it at the joint this way.
Then put your thumb in the back and pull.
You see the two bone comes out.
Then you remove that part of the end like this, which you're going to use for stock, and one of the two bone, you can pull out, which I'm doing here.
Now you are left with one bone, that piece of thing that you turn inside out to do, what we call, a little lollipop.
That little lollipop, often you roll that in cracker meal, something like that, you can fry it, serve it into a beautiful leaf of cabbage, for example, some cabbage to use it as a finger food, you know, for a party.
If you buy at the market, the whole wing, like I have here, I will do a lollipop with that part, and I will do a lollipop with the part that I did here.
You see?
But for our chicken here, I do all of this.
So again, you break it, you pull it out, separate your bone, pull one of those out, that's it.
Now here, I wanna bone this out and first, I wanna remove that triangle again, that we call the wishbone.
So I put my knife against it and pull it out.
Again, as I see here, it is broken.
Very often, the wishbone is broken now because they press it on the machine when they block it, and that break the wishbone.
And again, as I say, be careful because the end is very pointed and you can puncture your finger.
But the wishbone is that triangle, which actually even when you roast a chicken right there, is in the way during your carving.
So it's good to remove it.
Even when you do it, you keep it for that matter.
What I have here, then, the wishbone removed.
Now, the only thing that I want to do is to take the whole carcass out.
I don't have to use a knife very much.
The biggest mistake is to use a knife very much, or I have to cut the joint of the shoulder here and the joint of the hip there.
Do I cut here, there, here, there, on the other side.
With the knife, that's about it.
Now since I want to open it completely, I start by cutting the skin of the back.
Now I look for the joint of the shoulder.
Lift up the skin, put your finger there, and move that chicken like that.
I know there is an articulation right there.
I can feel it.
So I put the knife right where the articulation is, and I start cutting.
I am into it now.
But if I were not sure that I am into it, I would wiggle the knife a little bit and I would slide into it.
So I do this side, you do the same thing on the other side.
It should not take you much more than a minute to bone out a chicken.
The thing is done both way.
What do I do now?
I grab the whole wing, put my finger through the carcass and I kind of pry it out this way, you know, until I see the little oyster.
So again, here, I pull out until I see the oyster.
Do the same thing on the other side.
Pull out until I see the oyster.
Now what do I have?
The front of the chicken.
Don't worry about the filet.
We'll remove them later.
Put your two finger on each side of the sternum and you pull down this way until the whole front of the carcass is clean.
Put it down again.
Now you grab your chicken by the the leg here.
Again, you cut that little oyster this way.
Bring the knee higher so you can crack it open, cut through the sinew, pull out, same thing on the other side.
Cut the oyster, break it, and pull out.
What do I have now?
I have the chicken.
Basically the whole carcass, bone out, as you can see now.
The whole carcass is removed and here is the carcass.
And what do I have here?
The two filet.
I run my finger along the filet here.
Again, no use of the knife, as you can see.
You know, my finger, that's it, along the bone.
Removing again, that filet, I have the whole carcass here.
What I have cut is the joint here and there, here and there.
That's all stuck of course.
That correspond to those four bone.
This is the place where it's being held.
That's it.
Now if I want to use the filet here that I want to use, there is that long sinew into the filet that I want to remove.
What you do, you hold, I dunno if you can see here, the end of that sinew, you hold it with a towel, put your knife flat, and what you're going to do is just to scrape it.
You see?
I scrape it, and now I have that old sinew which was inside the filler.
Then the filler goes back into shape, more or less.
This is done.
You do of course the same thing with the filet from a turkey or something like this.
And again, we have it here.
Okay, we put that on the side.
Now if I wanna continue boning this out, I have to take the bone of the leg.
So what do I do?
I take the end of it again and cut all around, at least to be able to grab it, you know?
But I don't cut much.
I won't use the knife.
I use the side of the knife.
Now you can hear it.
I'm scraping the bone.
That's all you do.
Scraping the bone.
So I scrape the bone here until I am at the articulation of the knee.
Now I could cut the articulation of the knee, but it'll be hard after to go on.
So what I do on the contrary, now I cut all around the articulation, you know, going with your knife like that to go around and now that I have passed the articulation, then I start scraping again.
What do I have here?
The thighbone, the drum bone.
Where am I?
Am I here.
Now, I don't want to cut this now because the skin is going to shrink during cooking.
So use the back of your knife and break it, so that you can remove that and keep this.
When your gallotine is cooked, you can trim it later on.
So we do this, again, the same thing on the other side.
Remember that when you do this in term of technique, the technique are the same each time.
If you do a quail, if you do a duck, if you do a pheasant, if you do a chicken to saute, if you do a chicken to grill even, or other type of, you always cut into the same joint to separate it.
So it become very important.
Even to carve in the dining room, you always cut into the same place.
Again, I remove the wishbone.
Now the only thing left is the bone here, which sometimes we leave, sometime we remove.
If you want to remove it, I'm holding it underneath and again here, cutting all around under the articulation.
Now I can stand the bone on its own and press it down like this, as you can see, and pull it out.
That really doesn't matter.
I can plop that back into it.
The same thing here, and I push it down and now my chicken is totally deboned.
I mean, the idea there is to have the same layer of meat all over.
So I'm placing this here to reorganize modern nature a little bit.
If you want to have some there, you can lift up a little bit of the breast here.
The idea, as I say, to have one layer of skin, one layer of meat which you can then stuff.
What we wanna do here is put a little bit of salt and freshly ground paper.
And there, I have a stuffing, very simple stuffing of spinach and puree of mushroom.
What you want to do is to push a bit of that stuffing into the leg.
Remember to stuff your leg here, and then the rest, there is hundreds of different type of stuffing of course that you can do.
This happened to be a whole vegetable stuffing.
You can do it with meat, you can do it with liver, you can do it with pate, you can do it with all kind of different vegetable.
Now I have that layer, bring it around.
You see a common way of doing it to that is to sow the bag, but I don't think it's necessary because if you slightly overlap it like this, I have a bit of skin here that I can bring around and turn your chicken upside down like this, bring the skin here, cross his leg and now again, I'm ready to do the gallotine or ballotine, here.
You can do that at the pate.
So now we bring that around flat, make a knot right at the end here, keep a piece right there.
And now we do the technique, we call the off each, which is just this.
But when you do the the loop like that, grab that loop and make it slide underneath, gently.
Then bring it here and ease it.
Ease it into it.
Just don't pull on it.
Again, slide it underneath.
You make it just as close as you want.
You don't want to squeeze it too much.
If you have a stuffing, it depend on your stuffing, especially if you have eggs in your stuffing and roll it, because it'll tend to to expand a little bit, you know.
So here, I have my thing done.
So when I get to the end of it, all you do is to cut with your knife, very gently slide it over.
If I don't have enough skin here, you know, try to bring a little piece of the skin against it.
And my stuffing is not leaky here but if it was a leaky stuffing and I would be afraid, I put a little piece of aluminum foil right there.
You do the loop underneath to make it on top, like it is in the bottom.
Fold it again gently, and attach it wherever you start.
You now have what we call a poulet en saucisse, or a gallotine.
You can do that ahead, and now you're ready to cook it.
(smooth jazz music) Let me show you how to truss a chicken.
Now you would say, "Why do I have to truss a chicken?"
Well, you don't really have to truss a chicken.
It used to be done, it was more important years ago, the chicken used to be, you know, no less fatty as today and much dryer.
So you know, instead of the chicken being like that, we used to pull to push those legs back into it and really hold it together.
It's tying it, that we call trussing.
So the breast would come out nice and plump and it would protect the breast from drying.
It is not the case now.
So it's mostly for aesthetic reason.
Now in any case, I'll show you a couple of different way.
Again, for aesthetic reason here, we cut the end, in all classic French cooking the end of the wing this way.
Same way on the other side, the last articulation that you cut.
And again, as I say, purely aesthetically.
Then again, removing that wishbone here, cutting on one side, cutting on the other side of that bone, which this one is broken again.
So watch out.
It's in two piece.
You have one piece here, one piece there.
It will help later on in the carving of the chicken to have removed this, bring back that skin, and this, we put it in the back this way, press the chicken there, and now we are going to truss it with a trussing needle, which is one way.
Actually, I probably know four or five different way of trussing it, even with the trussing needle.
So those are long needle that apprentice used to have and you just put a piece of kitchen twine in it.
Again, that type of kitchen twine that I use, on the other side, you just attach the end of it.
So what I wanna do here is do an eight that is starting from here.
I don't start in the skin because it's going to move.
Lower than the skin in the thigh, there is a soft spot in the bone.
So I go from here to the middle of the thigh, then around, then back here to the middle, and across.
So I do one, two, three, four, like an X, if you want.
So put you like this way, I go this way.
See, there is a soft spot right in the center of the leg.
We push it to the end, move this around, upside down, then go through here.
I should have enough skin, which I don't have here, which I usually are careful to bring that skin around and pick up the skin with me as I go around, especially if I have a stuffing inside, doing it this way.
Bring it back there, and redo it as I did at the beginning, but from the center of that leg to the opening there.
So now you see what I have done is this, this, this, and now I come across here.
So this is the trussing with the needle.
Actually, when you do a large bird, you do a crossing here and another trussing there to all together.
But this is very good, this way.
So what you do now, it's important, is to turn the twine here two or three times, not only one time, two or three time because it's slightly wet.
When I pull on it, you see it doesn't release.
So that's good.
Then you do your second knot to secure it, and your chicken is now trussed, you know, presented nicely this way.
If you do it, you may do it without the trussing needle.
That's another way.
Sometimes, we remove also the wing here.
I am removing this one just to show you a different way of doing it.
And there, a piece of string.
Now again, no trussing needle.
So what I do here, you face the chicken in that direction, bring the leg back in to plump the breast.
And now what you do, you place this underneath.
There is four or five different way to do it without trussing needle.
I think this one is the best way, I tell you, because many other way, I've seen it's right across here.
You should not touch the breast.
So I have crossed above, put it under the drumstick to do a figure eight, and then now you close it, and that's all you do.
You bring it around and if I hadn't cut the wing here, I could anchor it behind the wind, I cut the wing.
So what do I do?
I anchor it behind the step of the neck, you know?
Then again, the same way, I turn this two or three times to be sure to tighten it good Cross it, and basically, you see it is the same idea.
Now if I want to roast a chicken, now, (indistinct), I use that type of a pot.
I mean, this is very thick, heavy copper.
It's lined up with stainless steel.
Now if I use a pot all the time, I know it's not going to stick.
When I don't use it all the time, sometime I hesitate, I say it may stick.
So I put a little bit of parchment paper and it brown right through it.
So what I do here, salt and paper inside, and a little bit on the outside.
You could, if you want, put a dash of oil or a dash of butter right in the bottom and on that piece of paper right here, just really to sell it because at the end, the idea is going to remove most of the fat from it, and that chicken is now going to be cooked on the side, like that.
That is breast side down, the juice goes in the breast.
You don't have to baste it.
It's going to cook 20, 25 minutes this way on that breast like this.
Then you put it on the other breast, another 20 minute, 25 minute.
So it's only at the end, you put it on the back and start basting it at the end.
Otherwise, the juice goes in, you don't have to baste it.
Now it's ready to be cooked.
(smooth jazz music) You know, when you handle a lot of meat and poultry, it's a good idea to wash your hands because of contamination, particularly salmonella and the raw meat.
If you have a cut on your finger, if the chicken, particularly poultry, happens to be contaminated, you know, you could have problems.
So it's a good idea.
Wash your hands good, wash your board, and so forth.
It's another type of technique.
And talking about technique, you know, it is not only in the kitchen or at the sink, there is different technique in the dining room also.
Many things that you do in the dining room have special technique, for example, folding a napkin.
And I don't like when I go to a restaurant or a friend to have a napkin twisted or tortured into some type of a bird.
I like it very simple because I know that I'm going to clean my mouth with it.
So this is folded in fourth, you know?
And the end of it here, which is there, leave it this way, fold that one just around here, and this one, very simply underneath like this, and this is the way I would like my napkin next to the plate.
Here, I can put the menu or maybe a roll sometime, and that's about it.
It's very simple and very clean.
Now another way that we do is to do an artichokes with the napkin and to do the artichokes, again, as square napkin, and we put a little bit of aluminum foil in the center of it to make it slightly stiffer, you know?
So what you do again, you start folding it.
So the four corner meat in the center.
But then after of doing, as we did before, you don't change side here.
What you do, you start bringing it again so that it joined in the center, so that the second fold, and you can have different fold.
It depend also of course in the length of your napkin.
So this is the second time, I do it this way.
Okay, I think I'll do it a third time, again on the same time, on the same side.
Here, now it's getting a bit stiff because I have the aluminum fold in the center, and now I turn it upside down.
I have three fold, and I fold it the other way.
Getting short, you know, here.
And this and that part, which we call an artichokes, When you do it this way, one time, you can take a ball like that, put it upside down and start, if you want, peeling your artichokes, you know, all around like leaves, you know?
This way, this way, this way.
Sometimes you do it with a ball, as I'm showing you, or sometimes you put your thumb into it and press and pull out the side, like this.
You know, I like to do it with the thing.
I think it's a bit easier.
So you keep pulling until the end, and now you have a type of artichokes that conventionally, you place in the middle of the tulip to serve like pomme souffle, (indistinct) and so forth.
There are obviously many more technique you can learn to make yourself a better cook.
But I hope I have encouraged you to pick up a few more skills in the kitchen.
Thank you for joining me, and happy cooking.


Support for PBS provided by: