Grilled Cheese and Tomato Soup
1/2/2021 | 24m 22sVideo has Closed Captions
Host Julia Collin Davison makes Grown-Up Grilled Cheese Sandwiches with Gruyère and Chives
Host Julia Collin Davison makes Grown-Up Grilled Cheese Sandwiches with Gruyère and Chives, equipment expert Adam Ried shares how to care for wooden kitchen tools, and gadget critic Lisa McManus rounds up the best graters. Finally, host Bridget Lancaster prepares the Ultimate Cream of Tomato Soup.
Problems with Closed Captions? Closed Captioning Feedback
Problems with Closed Captions? Closed Captioning Feedback
America's Test Kitchen is presented by your local public television station.
Distributed nationally by American Public Television
Grilled Cheese and Tomato Soup
1/2/2021 | 24m 22sVideo has Closed Captions
Host Julia Collin Davison makes Grown-Up Grilled Cheese Sandwiches with Gruyère and Chives, equipment expert Adam Ried shares how to care for wooden kitchen tools, and gadget critic Lisa McManus rounds up the best graters. Finally, host Bridget Lancaster prepares the Ultimate Cream of Tomato Soup.
Problems with Closed Captions? Closed Captioning Feedback
How to Watch America's Test Kitchen
America's Test Kitchen is available to stream on pbs.org and the free PBS App, available on iPhone, Apple TV, Android TV, Android smartphones, Amazon Fire TV, Amazon Fire Tablet, Roku, Samsung Smart TV, and Vizio.
Providing Support for PBS.org
Learn Moreabout PBS online sponsorship♪♪ ♪♪ ♪♪ ♪♪ ♪♪ -Welcome to "America's Test Kitchen" at home.
Today, I'm making grown-up grilled cheese sandwiches, Adam's got advice on how to maintain wooden kitchen tools, Lisa has a roundup of graters, and Bridget's making the ultimate cream of tomato soup.
We've got a lot in store today, so stick around.
♪♪ -My mother has always been into health food, so that meant when we had grilled cheese growing up, which wasn't often, it was made with a whole-grain bread and a nice aged cheddar or Gruyère.
Now, at the time, I did not appreciate those flavors, but as I've gotten older, I've come to love a good cheese on a good piece of toast.
But the thing about making a nice grilled cheese like that is that those good cheeses that are aged -- they don't melt well.
They separate, they get greasy, and they get a little grainy.
So the key to using a good cheese, like an aged Gruyère, which we're gonna do today, is to add another melting cheese.
And if you're gonna use a nice Gruyère, you might as well use a nice hunk of Brie, which is gonna melt really well and make that creamy consistency.
Now, the trick is we're gonna make a paste with these two cheeses using the food processor.
So I have 7 ounces of Gruyère.
To this, we're just gonna add about 2 ounces of Brie.
And, of course, you don't want to include that rind 'cause that's not gonna blend well or taste as good.
So a hunk this size is about 2 ounces.
And put that right in the food processor.
Now on to the Gruyère.
Now, you could use a nice aged cheddar here, too, but I love Gruyère.
It is one of my favorites in this sandwich.
And obviously we're gonna cut this up into some nice chunks before we try to process it into a paste, just to make the processing go a bit easier.
Mmm!
It's taking a little bit of willpower not just to snack on this cheese right now.
[ Laughing ] It smells really good, but it's worth waiting for.
So we're gonna put all this into the food processor.
And I have one more trick up my sleeve for making a really good grilled cheese sandwich that's really meant for adults, and that's gonna add a little wine or vermouth.
It just elevates the flavors of the cheese and adds a little kick.
So we're just gonna add 2 tablespoons.
I really enjoy using vermouth because vermouth has a little bit of an herby flavor that goes really nicely with the Gruyère.
Alright, so we're gonna let this rip for about 20, 30 seconds -- again, until it's a nice, smooth paste.
Ooh, that looks good.
You can see it's a nice spreadable consistency, and the two cheeses have been nicely incorporated.
Now, to this, I'm just gonna add a few chives.
I'm gonna give them a quick chop... ...and then just add them to the food processor, just to incorporate them.
It takes about four or five pulses.
[ Laughing ] Oh, that smells good already.
It's tempting just to spread this on a nice toast point, but it's worth waiting for the sandwich, let me tell you.
Alright, we're gonna set this aside.
We're gonna focus on the bread and the butter that we're gonna spread on the sandwiches to help them brown.
We're not just gonna use plain butter.
We're gonna add a little mustard.
Again, it just adds a little more flavor.
So I'm gonna take 3 tablespoons of softened butter.
I'm gonna add a teaspoon of Dijon, and we're just gonna mash this together.
And this just makes a simple Dijon butter.
Now it's time to talk about bread.
The thing I love about this recipe is you can use any kind of bread you darn want.
So if you want to use multigrain, go for it.
You want to use a white bread, go for it.
I am gonna use rye because I love the flavor of the rye with the chives and the Gruyère.
So we have eight slices here 'cause we're making four sandwiches.
We're gonna butter the bread, and it's better to butter the bread than the skillet because that ensures that the sandwiches get evenly brown as they cook.
Alright, so everyone gets a little butter.
Want to make sure you butter the whole slice of bread, right to the edges.
Alright, butter's on.
Now I'm gonna flip half the slices over, and we're gonna add the cheese paste.
Almost looks like mashed potatoes, doesn't it?
And, again, I'm just gonna spread this cheese out evenly edge to edge.
Ooh!
That is a good-smelling cheese blend.
Ooh!
The cheese is evenly on the bread, and now it's time to top it with that second piece of buttered bread, buttered side up.
Time to start cooking these sandwiches.
And we're gonna use a 12-inch nonstick skillet that's been heating up over medium heat for two minutes.
And you know the skillet's hot when you take a little bit of water and you sprinkle it in the pan, and the water sizzles like that.
Good hot pan.
Alright, in go two of the sandwiches.
We're gonna cook them two at a time.
So these sandwiches are gonna cook for about three to four minutes on each side till they're nice and golden and the cheese is melty.
Ooh, these are beautiful.
Alright, ready?
Oh!
Oh!
Goodness!
Ah!
Those are picture-perfect.
And that's what you get when you butter the bread, not the pan.
Alright, another three to four minutes on this side and they'll be good to go.
Alright, so these sandwiches look pretty good and toasty.
Time to take them out of the pan.
I'm gonna put them on a wire rack, and I'm gonna keep them warm in an oven while I cook the other two sandwiches.
The sandwiches are done, and it's time to have a taste.
Ohhh!
That browning is so perfect.
Ohhh!
Look at that!
Alright, enough looking.
[ Crunches ] [ Chuckles ] That is a grown-up grilled cheese, right there.
The Gruyère, that creamy Brie, a little bit of wine, and the chives.
I don't think my daughter would like this, so I'm gonna have to eat hers.
Mmm, mmm, mmm!
If you want to make grilled cheese for grown-ups, use two cheeses, butter the bread, not the pan, and heat up the 12-inch nonstick skillet over medium heat for two minutes before cooking.
From "America's Test Kitchen" at home, the ultimate recipe for grown-up grilled cheese sandwiches.
♪♪ -With a little TLC, your wooden kitchenware, utensils, and cutting boards should last for eons.
What is wood's natural foe?
I have a bowl of it right here -- water.
Water can lead to all kinds of disasters for wood, like scarring, scratching, softening.
You can see some splits in this board.
It can also lead to warping.
So what you want to do is give your wooden stuff a water-repellent layer, and that means seasoning it and maintaining that seasoning, much as you might your cast iron.
You have two choices for seasoning wood.
The first one is mineral oil.
You want to pour mineral oil onto whatever it is you're seasoning, wipe it across the entire surface, and then set it aside for a couple minutes to see how it absorbs.
If there are patches that look a little thirsty or a little dry, reapply, redistribute, get them covered, and then put it away for about 24 hours.
Come back, repeat that a couple of times.
If you use mineral oil, you're gonna need a couple of applications to build up that water-repellent layer.
The second possibility is to use something called spoon butter, which is this stuff.
It's a mixture of mineral oil and beeswax.
You can buy it, or you can make it yourself in a three-to-one ratio.
So you take the spoon butter, you spread it across whatever it is you're seasoning, and you put that away for 24 hours to let it absorb.
Come back the next day, buff off the excess, and you're ready to roll.
The way you can tell if your wood is properly seasoned is to flick some water on it.
And if the water beads on the surface, you know that that water-repellent layer is in great shape.
When it's time to clean your board or other wooden bowl, what you want to do is just wipe it down with dish detergent or maybe a solution of bleach and water -- about a tablespoon of bleach to a gallon of water.
And because water is the enemy here, just take a clean dishcloth and dry it off really well to get rid of any last traces of moisture.
And if you take care of your wood, it's gonna last you almost as long as cast iron might.
♪♪ -Whether you're grating cheese or carrots, potatoes or chocolate, lemon zest or ginger, there's a grater for the job.
Now, we've tested lots of graters, and each of these won our testing process in its own category.
Now, first, the rasp.
How would I ever get along without our winning rasp grater by Microplane?
Now, zesting citrus with this is so fast and easy, and you never get a bunch of the bitter white pith.
Now, compared to other rasp graters, this one took literally half the time.
It also makes heaps of whisper-thin Parmesan that melt beautifully in risotto or on pizza.
Now, for larger shreds, you have box or paddle graters.
Now, box graters are classics, but do you ever really use all four sides?
I think paddles offer an easy-to-store, flat device that you can prop right over bowls or on the cutting board.
On the other hand, box graters do have the advantage of having this sturdy tower-like construction, and they do trap all the shreds inside.
It's up to you, but in either case, what you want are large grating surfaces.
They really let you get more shreds per stroke.
And you want large raised holes with sharp teeth so they're really able to shred hard vegetables and soft cheese very quickly with very little waste.
We also love graters with big handles and rubber-tipped feet and bases so they're easy to hold and they sit securely on a cutting board.
Now, finally, we love this rotary grater, both in the kitchen or at the table.
It has this nice big hopper to hold chunks of cheese, a handle that doesn't strain your hands, and it keeps the cheese in place.
It's got a sharp grating wheel inside and an easy-to-turn crank.
You can just grate piles of cheese without worrying about your fingers, and even kids can use it safely.
This winner by Zyliss even works for shaving chocolate onto desserts.
So whatever you're gonna grate, we've got a greater grater for the job.
♪♪ -A great cream of tomato soup doesn't have to come out of a can.
You can do so much better, and I'm gonna show you this easy recipe that starts with...a can.
This is not pre-made cream of tomato soup.
These are canned tomatoes -- whole tomatoes packed in juice.
And these are really gonna be the backbone of our tomato soup recipe that's packed with tomato flavor.
So I'm using two 28-ounce cans of whole tomatoes packed in juice.
And the first thing that I want to do is drain these.
Now, I'm gonna work on these one at a time, and you're gonna want these to drain over a measuring cup because we want to collect all of that beautiful tomato juice.
Remember, this is packed with tomato flavor.
So now this is the fun and squishy part.
I'm just gonna break these open with my hands and get rid of any seeds that are in there.
And then as I do this, all that juice that's inside is also going to drain down into the measuring cup.
As I work with these, I'm gonna move them over to a rimmed baking sheet that I've lined with foil.
Alright, these last little solids from this first can, and now I just want to press through any of that pulp that's in there.
Alright, that's looking pretty close to drained, so now I'll dump in the second can -- again, this 28-ounce can of whole tomatoes packed in juice.
And the same thing -- I'm going to seed these, let the liquid drain, and then we'll move on.
Alright, so that is looking good.
We need about 3 cups of tomato juice for our recipe.
So I'm gonna let this finish draining and just put this off to the side.
And now let's get back to those tomatoes.
We are gonna oven roast them and really draw out their sugars and caramelize them.
And we're gonna help that process along with a little bit of brown sugar.
Now, cream of tomato soups that come out of a can are almost like candy, but this really is not nearly as sweet.
We're only using a tablespoon and a half of brown sugar in total for this recipe.
So I'll just pack a tablespoon, and then what I like to do is just put it in my hand here and start sprinkling it over the tomatoes.
Alright, these are ready to go into a 450-degree oven.
Alright, I'll put these on the upper-middle rack, and we're gonna leave these in here for 30 minutes.
They're gonna start to caramelize and get a little bit dried-out looking.
They're not gonna look like too much, but it almost has the flavor of sun-dried tomatoes.
♪♪ Alright, you can see the color on those.
That's all the caramelization of the brown sugar and the natural sugars in the tomato.
And a little earlier, I did say that they taste a bit like sun-dried tomatoes.
No, they're way better than sun-dried tomatoes.
Sun-dried tomatoes are just dried.
These are dried and caramelized.
While these are cooling, we're gonna work on the rest of our soup.
Very easy to put together.
We're using shallots here.
They have a little bit of a softer bite than onion, and our recipe calls for 4 shallots.
Now, I think there's 2 shallots in each of these.
Yep, see, we got a double shallot here piggybacking on there.
You thought you could sneak in.
So we want to finely mince the shallot.
All in all, a shallot measures about 3 tablespoons of minced shallot.
So for four shallots, we're looking for about 3/4 cup of minced shallots.
Alright, so let's get cooking.
Now I'm going add 4 tablespoons of unsalted butter to my saucepan, and I'll put this over medium heat.
We're gonna melt the butter and wait till it gets to the point where it's just foaming.
Butter is melted.
That means it is time for me to add the shallots.
Alright, last little bit there.
So I'm gonna add even more tomato flavor with a shot of 1 tablespoon of tomato paste, and we're gonna add a little bit of warm spice.
Now, you have to be careful with the type of warm spice that you add to your tomato soup.
Things like cinnamon or nutmeg can taste wrong, but this is just allspice.
It's got a beautiful balance.
It's not too overpowering.
And, really, we only need about a pinch.
I call that a "tip of the paring knife" measurement.
So we're gonna cook all this together.
Let me just mix in that tomato paste.
Once it's mixed in, I'm gonna turn the heat down to low, put the lid on it.
And we're gonna let this cook until the shallots have softened.
That's gonna take between 7 to 10 minutes.
♪♪ Alright, let's take a look at what's going on in our saucepan.
Oh, smells amazing.
And you can see that color.
Beautiful shallots.
They're nice and soft.
Alright, so we do have some fat in the pan.
We're gonna use that to create a roux.
I'm going to add in 2 tablespoons of all-purpose flour.
And since we want to use the roux more for thickening rather than to add flavor, we're only going to cook this for about 30 seconds, just so that it loses its raw-flour taste.
Now that the flour's just moistened a bit, we're going to whisk in the first of our two liquids, and this is 1 3/4 cup of chicken broth.
Now, we didn't want to add too much more chicken broth to this because then it tastes like chicken-and-tomato soup, and we want it to taste like tomato soup.
And now those reserved tomato juices go in -- 3 cups, to be exact.
Alright, so I'm bringing this back up to a simmer over medium.
And while I'm doing that, I'm just going to peel off these tomatoes.
A great tool for this is a pair of nonstick tongs.
We're gonna add them right into the soup.
The tomatoes are almost like taffy as I pull them off.
It's just that caramelized sugar.
Alright, so that looks fantastic.
I'm gonna stir in those tomatoes.
So let's put on the lid.
Now I'm going to raise the heat to medium.
We want to bring this up to a simmer, and then once it's at a simmer, I'm gonna turn it down to low, and we're gonna let it simmer until the flavors meld.
That's gonna take about 10 minutes.
♪♪ -I never thought I'd do a television segment sitting on the floor in my kitchen, but I want to show you what's inside my freezer, and this is the best way to do this.
Now, you are thinking, "There's ice cream in there."
Yeah, sure, frozen stuff belongs in your freezer, but, basically, I put things that I want to last a long time, especially things with a lot of fat, which otherwise will go rancid.
So, for instance, a lot of people put their nuts in the pantry, and you know what?
They come back, and their nuts don't taste very good.
I like to buy nuts in bulk, and they belong in the freezer.
Pecans, walnuts.
This includes seeds.
Got sesame seeds.
They belong in here.
So, speaking of fat, what's our favorite fat?
Butter.
Do not put butter in your fridge until you're ready to use it.
So I keep pounds of butter in the freezer.
I put one stick at a time in the fridge as I need it.
Otherwise, if you leave it in the fridge, it picks up all the orders of what's in your fridge.
Oh, look -- spices that my in-laws brought back from Morocco.
I've got frozen shrimp.
Always have those on hand, ready to thaw whenever I'm ready to cook them.
More flours -- I've got brown rice flour, almond flour.
Basically anything that's whole-grain, meaning it has some fat in it -- it belongs in the freezer so it doesn't go rancid.
In the pantry, it's gonna go off very quickly.
And then my prized possession.
So this is semolina from Sicily that my friend Dan brought back.
Look -- there's even a little tag in it.
Russello.
I think that's actually the name of this flour.
It's kind of golden semolina.
My wife and I use it to make pizza.
So, your freezer -- it's more than just a place to put your ice cream.
♪♪ -Alright, after 10 minutes, it is time for us to puree the soup.
All we needed was a little bit of time for those flavors to meld, but it's pretty much done cooking at this point.
Now, one of the great things about that canned tomato soup is that really velvety texture.
Again, we're not trying to mimic the taste too much, but that texture is hard to beat, so we want this to be super smooth.
Now, I could take an immersion blender and just put it right in there, and it would get pretty smooth.
But, really, there is a foolproof way to blend soups.
The first thing you have to do is strain the soup.
I'm gonna put it right back through the fine-mesh strainer over the same big measuring cup I had before.
I don't need to get rid of all the liquid here, but I [chuckles] -- I've learned my lesson.
I am going to just scrape off the bottom because I'm gonna transfer these solids to my blender here.
Now, I'm using a really powerful blender here, but this technique was actually built for blenders that are less powerful.
So this is going to puree it super smooth in any case, no matter what kind of blender you have.
I want to add a cup of the liquid, and this is what makes it key and gives us that real velvety texture.
If we were to add a lot more of the liquid in there, the blender has a hard time pureeing those solids.
But just by using about a cup of the liquid along with those solids, it keeps everything towards the bottom of the blender, so you're gonna get a really smooth consistency.
So I'm gonna put the lid on, and we're gonna blend this until it's nice and smooth.
That's gonna take about a minute.
And in the meantime, I'm gonna go ahead and rinse out my saucepan.
Alright, let's take a look in here.
[ Inhales ] The smell is amazing, but you can see how super smooth that is and velvety.
That's exactly the texture we want.
Alright, let me put that aside.
I'm going to add the rest of this tomato liquid right back in there.
So at this point, we have kind of a creamy tomato soup, but it's not really cream of tomato soup until we add cream.
I have 1/2 a cup of heavy cream, and I'm adding the cream close to the end of cooking because I want to retain that fresh cream flavor.
That's starting to look beautiful.
Alright, so we're gonna heat this over low heat until it's just rewarmed through, and that's only gonna take a few minutes.
That looks just about perfect.
Just a couple more flavors.
Again, we're adding them at the end to preserve their flavor.
And the first one -- it's a little bit of brandy.
You can also use sherry or cognac -- something nice and warm.
This is optional, but I'm gonna opt in.
So I'm adding 2 tablespoons, and this is off heat now, so we're not cooking away the alcohol, 'cause it's cold outside.
Let me go ahead and stir that in.
And I'm gonna give it a nice taste.
That does need a little bit of salt and just a little pinch of cayenne pepper.
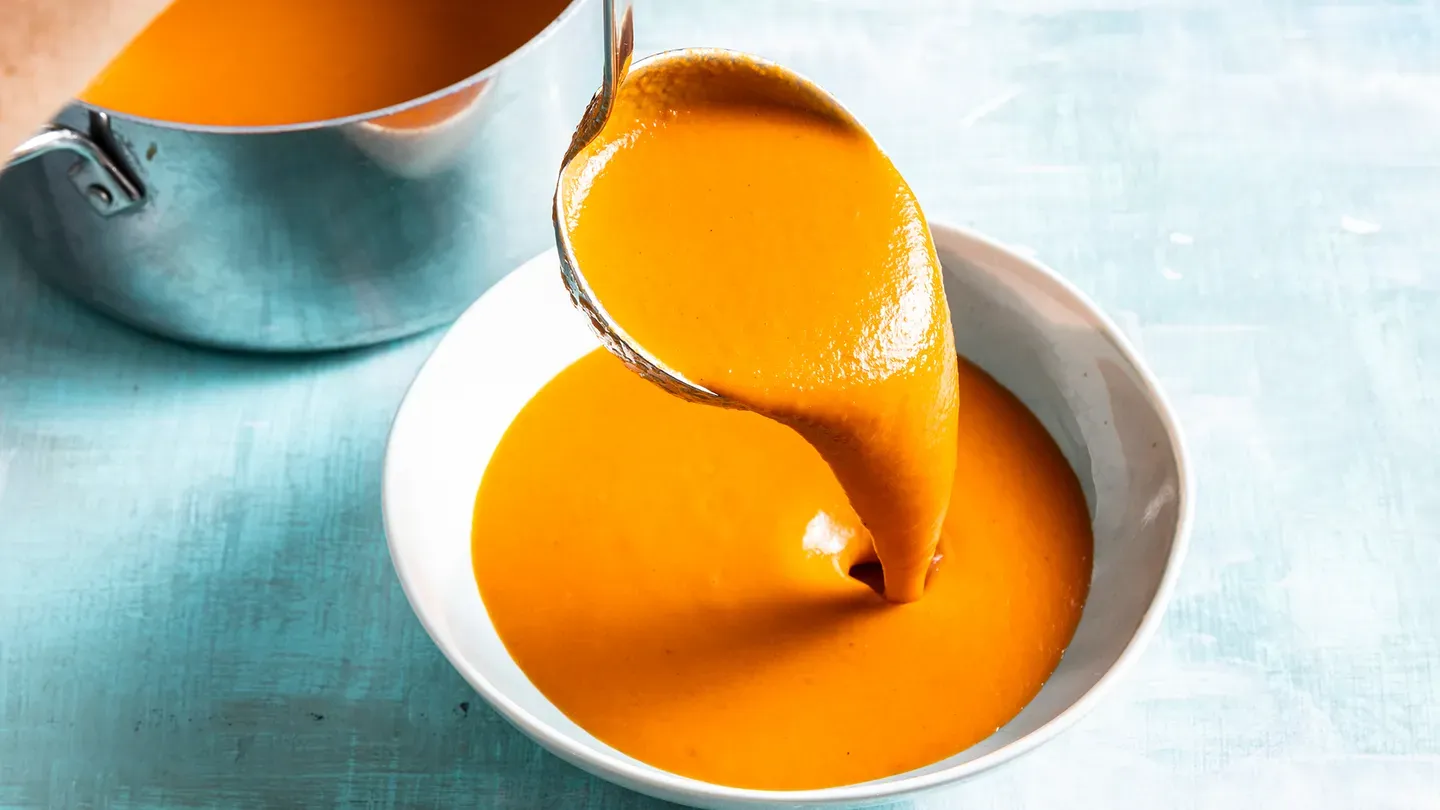
We are done with the soup, so let me go ahead and dish it out.
Mmm!
Look how smooth that is.
That's gonna warm the insides up, that is for sure.
Just a little bit more.
This is perfect on its own.
Of course, you can always serve it with bread or crackers, but, of course, it's always perfect with a grilled cheese sandwich.
It's unbelievable.
It is so tomatoey and so deeply flavored from the roasting of those canned tomatoes.
It doesn't taste tinny at all.
It's got just enough cream to add a little bit of body, but still has some of that fresh cream flavor.
And then there's all the warmth in there.
We have the allspice and the brandy, of course, a little bit of cayenne at the end.
It's a bowl of perfection, perfect for a winter day.
And if you want to make this at home, the keys are roasting whole canned tomatoes, using the reserve tomato juice, and blend the solids with just a small amount of liquid for a velvety texture.
So from "America's Test Kitchen" at home, a velvety warming-your-bones -- my favorite -- the ultimate cream of tomato soup.
I'm gonna need a bigger spoon.
-Thanks for watching.
You can get all of the recipes from this season, along with our product reviews and more at our website -- americastestkitchen.com/tv.


Support for PBS provided by:
America's Test Kitchen is presented by your local public television station.
Distributed nationally by American Public Television